TechSmith Camtasia 2020
Dear Followers, welcome to this video. Let's see all you need to know to start using the newest Camtasia Studio nine for the first time. When you open Camtasia a startup dialog box opens. Under get started, choose what to do. Click on New Project to open the main Camtasia interface to start editing your media. Click on new recording to use Camtasia screen recorder and start recording your own screen or any audio. If you have any Camtasia project saved, you can straight open it by checking the list under recent projects or use open project to browse for it. Below under tutorials, you can watch several videos from TechSmith in order to get help with the features you need.
.jpeg)
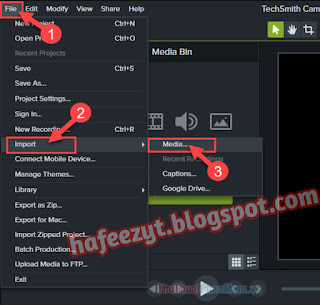
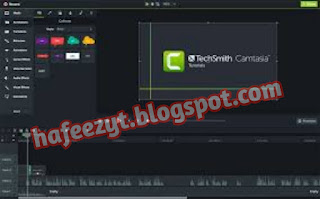
Let's start with a new project by going to new project. Before starting you have to import your own media files such as videos, pictures and audio inside the timeline below, which is the heart of the video editor. On the far left under the Media tab, browse for all your files to import. Inside library you have a list of video background and audio samples inside Camtasia that you can import by clicking and dropping them on the timeline below. To import media from your computer, instead, you can simply drag and drop them directly on the timeline. All Files imported inside the timeline are collected inside the media bin panel on the left and are contained inside several rows, also called tracks. Each file is represented as a rectangular block called clip with the file or sample name on it. Then, if the clip is related to any video or image file, it will show small thumbnails on it very useful to recognize each clip. If you have audio clips, it sound waveform is shown. If a video clip has audio inside, you will see both thumbnails and sound waveform on it. If the clips are extended too much in time, just regulate the timeline zoom by using the zoom bar right on top.
The preview right on top is very important while creating your videos. This shows the overall content inside your timeline exactly where the main playhead is placed. So click on the timeline to preview a particular frame of your video or click and drag the playhead to check your video more carefully on words or backwards. Consider that both the file name and its thumbnail will be hidden when they meet the playhead. To fully playback your project Instead, use the player right below the preview. Let's better check the timeline all the tracks inside it or equal but indeed their order is very important.
For example, if you have video or picture clips that do overlap during time, the preview shows the clips placed on an upper track always above the clips that are on down or tracks in position. Also, each track has two great options to manage your timeline content. The eye icon is used to enable or disable the track. A disabled track hides all its content inside. The lock icon below locks the track which means that you will no longer be able to edit its content until you unlock it. To insert new tracks or delete one, just right click on a vacant space. Let's see now how to do basic editing on your clips. Each clip can be moved in time in the manner or in another track by clicking and dragging them. In case of video clips with audio. You will move both video frames and audio as they are a unique clip. But if you need to make Teach them separately, just right click on the clip and go to separate audio and video.
To stretch or shorten the clip in time, just drag from its edges. This will cut part of its content. To cut, copy or delete a clip, right click on it. to paste a clip right click on a vacant space and go to paste. The clip will be placed where your pointer is. If you want to split a clip into set the instant of time by placing the main playhead and then use the Split button on the left or the SK from your keyboard. Remember to use the Undo and the redo buttons in case you make any mistake. These are used to manage all your actions made inside Camtasia.
Even more, you can edit the clip appearance as you like. Next to the preview, you have the Properties button. This shows all the main properties for the selected clip you have inside the timeline. These are divided between the visual properties indicated by a frame icon and the audio properties indicated by a speaker icon that are shown depending on the kind of clip selected. For example, if you select a picture, just the visual properties appear. If you select any video with audio, both visual and audio properties will show up the visual properties adjust the clip appearance such as its scaling and opacity level, its inclination and position.

You can use the precise settings on the right or work directly on the preview. For example, you can move the clip by clicking and dragging or scale it by using the nodes around it. Make sure to use the ones on the clip corners to lock the aspect ratio. Rotate the clip by using the right node on the center. To reset ninny applied modification, just use the reset buttons. Under audio properties, you can adjust the clip volume by regulating its gain level. You can adjust the clip volume directly on the timeline as well. When you select an audio clip, a green envelope line appears representing the applied volume during time. You can pull it up or down to regulate a constant volume. Or if you double click on the line, you will add points that are used to change volume in time. Just move them up or down to set the volume level on where they are placed.
or right click on them and go to Delete to delete bam. You can also crop picture and videos directly on the preview by using the crop tool on top. Just use the clip nodes to set the clip area you want to save. Inside Camtasia You can also adjust the playback rate for each clip in order to play them slower or faster. To do so just right click on a clip and go to add clip speed. Then, if you stretch or shorten the clip from the blue icon, you will change the clip duration by changing its playback speed. So without cutting any of its content, a rate lower than one means a playback speed lower than the original one. Otherwise, a rate higher than one means a clip that plays faster. On the left under the Media tab, you have other amazing features inside Camtasia that we won't see in this beginner tutorial.
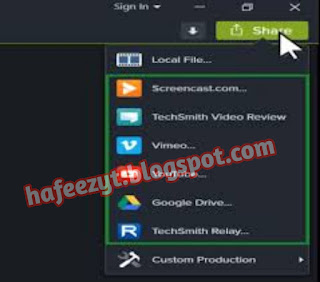
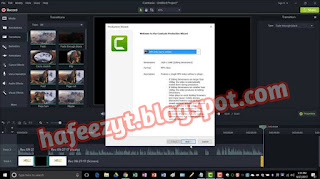
Remember to save your Camtasia project in progress by going to File and then to Save as this saves all your status inside your timeline, including all the settings applied on each clip. But to obtain the final video to play an upload, you have to render it by going to the share button on the right. Choose local file to render your project inside your computer. After choosing the file format, the video resolution under the size tab and the video frame rate and quality under video settings. Or else to render and upload your video directly on social websites. Choose the proper one from the share button list. Camtasia Studio is also used to make recordings from your screen, webcam or all To. To start recording, click on new recording on the startup dialog box or on record on the main editor. These open Camtasia screen recorder that appears as a small dialog box with all domain recording settings inside.
Under select area, choose full screen to record your whole computer screen. adapting the video size to the screen size as it is, or else click on custom to personalize the recording area by checking the overall resolution under dimension, where you can eventually lock or unlock the aspect ratio. Under recorded inputs, click on camera to enable or disable your webcam. If enabled Camtasia will record both your screen and your webcam, click on audio to enable or disable the recording for the audio part.
Also, if you click Next to the audio button, you can choose whether to record or not the system audio and the audio coming from your microphone each. More on the right regulate the volume to be applied to the audio. You can adjust other important settings going to tools and then two options. Let's see the most important ones. Under the General tab you can choose whether to record a bi or a tr e c video file. The ABI file is a video that you can scrape playback or upload online, but does not let you record both screen and webcam at the same time. To do so, you need a tr e c file. D rec file files are formats managed by Camtasia only very useful to record both video inputs. In fact,
when you import this file into the timeline to video independent clips are shown one for the screen recorded and the other for the webcam. This tr EC file can't be used directly outside Camtasia so you have to render it through the share button before using it. Then under the inputs tab, regulate the frame rate for your recordings by choosing in the list or typing inside. After a short countdown Camtasia will hide on the task bar. When you open it, you can use its interface to delete pause resume, or stop the recording to save it. The recording done will be added inside the media bin panel ready to be imported inside the timeline. If you don't know where recordings are saved, just right click on these go to open file location. Thanks for watching this video. Check out our channel for more amazing and free video tutorials.


.jpeg)


.jpeg)

1 Comments
passward camtasia
ReplyDelete